Tag Archives: rudder post

Drama on the high seas

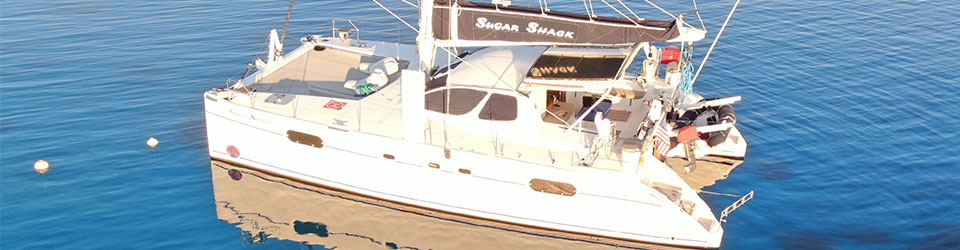
First and foremost everything is fine on board, we are continuing on toward Fiji as planned still with a stop in Tuvalu.

We left Majuro bound for Fiji with 2 stops along the way, Kiribati and Tuvalu.  Its the end of cyclone season, Yippie, except for the one that just popped up between Vanuatu and is heading toward New Zealand.  We are heading to “Bula” country, home of friendly people and kava ceremonies. 

When we left the Marshall Islands we had 2 steering helms, 2 rudders, 1 auto pilot and 2 souls capable of steering the boat with any of those.  And we have an emergency tiller too, in case everything goes pear shaped.  Let me say, we have had some “challenges” on this passage south. 

First arriving Kiribati, one of the steering boxes on the starboard side decided 24 years was enough, and demanded attention.   One its bearings on the inside the steering gears rusted through and burst into pieces.  One steering station down. Now we can no longer steer the boat from the starboard helm, and that is also where the gas pedal is.   So picture a clown car with the clowns carrying around the steering wheel, yet the car won’t turn. Turn as you might the steering wheel, helm, just spins indefinitely.   To actually turn, you have to run to the other side of the drivers end clown car to steer and run back to give it gas or slow down.  What can go wrong?  🙂  The clowns always make it work, right?   I actually removed the steering gear (red below) where the bearings disintegrated, so that the pieces and wobbly gear wouldn’t lock up the steering completely.  So whew,  order bearings to repair and head off to Tuvalu.  Not ideal but we have 2 of everything, part of being a catamaran.

Left Kiribati bound for Tuvalu.

The sail started out as champagne sailing doing great speeds and making short work of 700 miles we were making toward Tuvalu. It devolved a bit into prosecco sailing when the speeds dropped a bit, but still great fun.   Day 3 the squalls of the ITCZ (convergence zone between north and south hemispheres), quick wind shifts and gusts made for some exciting times.  Nothing out of the normal for this part of the pacific crossing the equator and the convergence zones.   When the wind went too light and on the nose, it was time to check the engine fluids before starting and to spot any potential issues.  I found the port rudder “control arm” broke at some point, probably during one of those pesky 30kt squalls.  The ones that steel your perfect wind and force you off course.  Thinking back, the broken bit might explain why it took longer than normal to turn downwind to run in the storm.  So the port rudder is down till we find a stainless welder.  Its lashed to the central position now, its just not wobbling too and fro willy nilly, and getting a free ride.

So for those keeping count, we have 1 working steering helm station (port), 1 working rudder (starboard), 1 auto pilot(starboard), and 2 less than pleased souls on board.   And of course the emergency tiller when all else fails.    So now we still use the gas pedal on the starboard side, run to port side to steer, the steering rudder is actually on the starboard side.   Got it?  A bit complicated but we are still trucking along, albeit a bit more conservatively till we arrive Fiji and work on getting cold beer to tackle fixing the steering project.

Is it Fiji that doesn’t like our steering?  2 years ago, one of our rudders vanished on the way to Fiji.  This year, other steering components are making their voices heard. 

275nm to Tuvalu, then another 500ish to Fiji.. we will get there!

Rudder Rebuild: The Rudder Part II

In Part I of our Rudder Rebuild 1, we walk you through the steps we took to custom design our new rudder posts.  Now we are ready to custom design each rudder blade.  The shafts had to be completed before we began the design process on the blades. 

Both of our rudders were removed immediately after being hauled out.  We were on the trailer and still dripping with water, but they had to come out now while we could raise the boat high enough to get them out of their casings. 

It is pretty clear that the temporary rudder and our standard one are very different shapes, but the surface measurement is about the same.  The borrowed rudder came off a bigger Catana 50, same manufacturer but very different blades.

The one on the left was borrowed from Norsand and the one on the right is our original 23 year old rudder.

Rudder Casing  is Compromised

After we removed the rudders we stuck our heads below the hole and looked up with a flash light.  To our horror we found a few issues with the rudder casing.  One there is a slight crack at the entrance and two there is a bump inside that was rubbing on the rudder post.  Lucky for us, both are fairly easy repairs.

Peter, the expert glassman and rudder specialist, comes over to help us remove the bearing and do the repairs. The bearing proved to be a bit of a challenge as it did not want to come out.  They get a massive sledge hammer and attack it from the top and bottom.  Once it is out, we sand down the blister, fill and paint it before installing the new bearing and case.  It all sounds simple enough but it took them several hours to complete this project.

As you can see the bearing case (lower two photos) was in need of replacement and lucky for us we had a spare on board.  Evidently, it was not considered “horrible” and still functional but we replaced it anyway.

Getting Started on the Rudders

We hand over our old rudder and the two new shafts.  The foam is cut and patterned to fit our new shafts and tines.  As you can see, the rudder posts and tines support the blade a lot better than our original ones which stopped before the center of the rudder.  Weights are put on the foam to ensure it all sticks together.

We are not on site to watch the exact process so I may be missing steps.  Once the foam is sealed and molded they apply fiber glass.  The rudder on the left is done and the one on the right is in process.

Norsand Takes Over 

Once the fiberglass work is done, they are sanded down.  Then we make the executive decision to apply the Hemple barrier coat instead of the Interprotect barrier coat.  Why did we use a different barrier coat on the rudders than on the bottom of the boat?  The primary reason was we didn’t want to wait 2 weeks for the Interprotect to off gas.  So we used Hemple and dealt with the difficult application process.

The Hemple barrier coat was having a hard time curing which meant they could not sand the peaks and valleys.  We were delayed by 5 days waiting for the paint to cure, sand, tweak, sand, tweak and sand again before the rudders were handed back to us to have Norsand apply the coppercoat.

Norsand quickly covers the rudders in coppercoat repeating the same process as on the bottom paint

Once the coppercoat is dry, they sand the rudders to activate the coppercoat.  Then it is time to fit them.

Does the Shoe Fit?

Must admit that there is a little anxiety about the rudders fitting properly.  We were confident the builder knew what he was doing and did it perfectly, but there is a little niggle in the back of our minds.  We knew they were made much stronger and safer than our previously rudders that were factory made and lasted 23 years.  But it is hard to relax until they are fitted.

The yard has to raise us on the trailer in order for us to be high enough to insert the rudders into their shaft/casing.

Peter, Tony and Kevin are on hand to help us install the rudders.  Matt is inside the engine compartment inserting the bolt (bottom right photos) while Peter and Tony insert the shaft.  It is a perfect fit on port.

Starboard needs a little bigger spacer which we can easily make with help from Rob at RH Precision.  What a relief to have two stronger, well crafted rudders back on the boat!

Our blog posts run 10-12 weeks behind actual live events.  This blog posts occured during over 2 weeks in November.  Did you see how we custom designed our rudder posts in part I?

Rudder Rebuild: The Shaft Part I

As you might recall, we lost a rudder while at sea crossing from Minerva Reef to Tonga – it was an utter rudder disaster.  We managed ok for over 1,000nm with just one rudder before we were able to get our hands on a temproary rudder which we then had custom fit to our boat.

But it is time to replace both rudders now that we are in New Zealand and the boat is hauled out.  We researched many different options including having Jefa Rudders custom design them from the UK; a boat builder in Auckland, NZ;  Foss Boatbuilders in Los Angeles; and considered having Norsand Boatyard do the work. There were pros and cons with each company, so we decided to hire local professionals that we had first hand knowledge of their expertise and skills.  They had already worked on our boat and had years of glassing experience.

The Rudder Shaft

The first thing we have to do is design and build the rudder shafts (or posts).  Technically, both of our rudder shafts are “in tact” but the tines or fingers on the port shaft are damaged.  At the top of the shaft you will see a ring and one tine sticking out.  This is the front of tine and there is supposed to be a back.  The middle tine is broken half way in the front and has no back portion and the bottom tine is completely gone.

Damaged Rudder Shaft with broken tines

Damaged Rudder Shaft with broken tines

We engaged our friend Rob at RH Precision while we were still in Tonga.  We love Rob!  He has done several stainless projects for us and is just a gem to work with!  He has all of the fun tools and machines for welding stainless and aluminum.  Matt finds the dimensions and all of the measurements to our existing rudder shafts (thanx to the Catana Mailing Group and several other Catana owners who shared their specifications).  

We triple check all of the measurements with our existing rudder shafts (both the damaged one and the one that is still in tact).  And then we double check them again.  Matt specifically orders 6082 aluminum (from High Grade Metals in NZ) which is stronger than our original lighter aluminum.  Rob works his magic and expertly replicates our rudder shafts as per the diagram.

Bigger is Better

Rob then drills the holes. There are 4 holes near the top which is how we connect the post to the boat and 4 holes for the tines.  We decided to go with 16mm tines which are bigger and stronger than our current 14mm tines.

I assumed Rob would be able to do the tines as well, but I was wrong.  We had to get the rods for the tines…hmmm.  Rob sends us to Vulcan Ullrich Aluminium in Whangarei where we are able to purchase a 5m of 16mm rod.  We have them cut it into (8) 280mm pieces and we take the almost 4m of extra rod back to Rob as a gift.

The Final Steps

Rob pounds the 8 pieces into each hole for us and then we take it to Absolute Stainless to tack them in place so they wont move (tack weld).  Yep, this is a process.  It doesn’t take long to tack weld them as we were able to pick them up the next morning.  The next step is to have the rudder shafts anodized.  So, we drive them to Auckland (2.5hrs each way) to Alert Anodising where they will put 25 micron hard black to protect them.  We had wanted marine grade but evidently there was a mix up. Rob assured us it would be fine and that this was still very good.

10 days later we make the drive back to Auckland to pick up our newly anodized rudder posts.  

The shafts look so sexy!  I am not sure why I think they look sexy with the anodizing, but I do!  We laid the new shaft next to the old shaft and what a difference.  The new shafts are about 27cm longer and weigh almost 1 kilo more than the older shafts.  Compare the damaged shaft to the new one on the right photo.

Now we are ready for the blades.  Stay tuned for part II of the Rudder Rebuild.

Our blog posts run 10-12 weeks behind actual live events.  This blog post occured during November 2023.